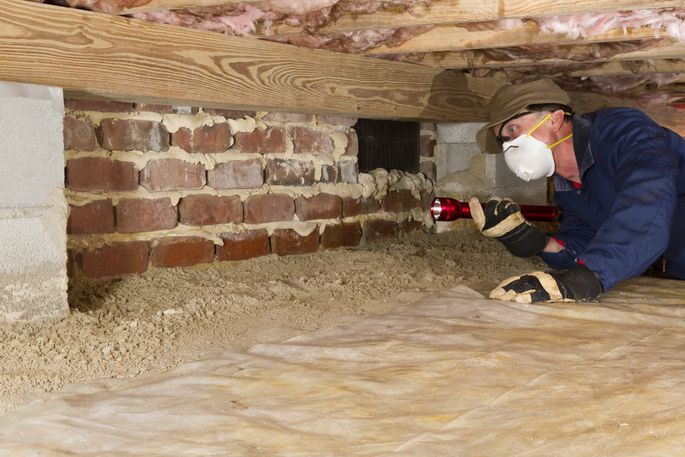
A crawl space is present in various homes for small underground storage sites. However, there is a way you can convert this storage area into a basement by only digging out the crawlspace and support it. While digging, you will have to give support to the ceiling of the dugout area. It is advisable to start by keeping the center before working out.
Remember, you can seek the help of a mason, but this is something you can do yourself. It is cheaper and satisfying when you carry out the task independently.
Step by step guide on how to dig out basement from a crawl space
Below is a complete guide to successfully take you through the whole process. These steps are simply what you only need is to avail yourself and gather some useful tools like a wheelbarrow, concrete, shovel, and adjustable steep support beams. Try also to consider the moisture content and soil composition because they play a vital role; it varies from place to place.
More so, you will have to get an Oneida Air Systems from any store or Amazon for dust collector. Besides, a trash can is another excellent alternative for the above dust collector. Ensure you have washers, stainless steel bolts, nylon lock nuts, and 20 feet vacuum hose.
Step 1: Take measurements
Now that you have the necessary tools to take out your measuring tape and correct measurement before you start to dig out. Taking measures is useful to know the exact area you plan to dig out.
Step 2: Digging down a ramp through the crawlspace
This step is very simple as you only have to get some tools like a wheelbarrow and a shovel. Use the shovel to dig forward and down while clearing the place gradually. This statement implies that you don’t have to let the soil accumulate in the area; remove it before you get more in-depth.
Step 3: Keep digging forward till you meet a support post
The support post should be your target while digging forward. At this step, you need to start digging down until you reach the depth you would wish your basement’s floor to be. In short, you should go by the measurements; how deep should be your basement.
Remember, the right basement height should depend on the soil’s moisture content and composition. Knowing these two factors is essential not to get deeper, yet the soil condition doesn’t allow it.
Step 4: Dig a suitable foundation for the new post
Here, you will have to create a foundation for a newly installed support post. Remember, this new support post should be near the crawlspaces support post. After securing the place, dig the hole about 5 inches deep than the basement’s floor. Don’t worry about the diameter, as long as you don’t let it be too small or too large. The last thing to do under this step will be to fill your hole using concrete.
Step 5: Installing a new support post on the new area
Under this step, I would advise you to get a steel support post that is adjustable enough to fit your dugout area comfortably. It should flush with the available ceiling on the site. Continue digging at the center until you find the support posts.
Step 6: Digging out the periphery of the new basement
You need to much careful under this step because you don’t have to reach the foundation; you should remain at least 2 ft. away. Failure to do this may lead to dirt accumulation in the foundation, which might be a bad idea. Such a mistake may force you to install an additional support structure(s) on the wall.
Step 7: Air tightening
Slap some calk, E6000, bubble gum, etc., to prevent air from getting into your system. I would prefer you to use E6000; fix the sealer before tightening the bolts.
Step 8: Grit prevention
This process looks complicated, but with the aid of the E6000, seal the crack between the dust collector and the bucket. However, you can use hot glue, JB weld, or epoxy, but still, I would recommend E6000 because it is more flexible.
Step 9: Attaching the VAC
This step involves installing your VAC short on the dust collector. The VAC should go down, side the stairs until it reaches the crawl space. Buckets are installed outside in the welding garage to keep you off from walking down and upstairs with buckets.
Getting rid of buckets is very simple than moving a trash can when it is filled. More so, make sure you start painting after through with scrapping ceilings.
Step 10: Start sucking.
If necessary, use a screwdriver when dislodging chunks to vacuum up all dirt. Remember, replacing the lid with a bucket is advisable than walking upstairs with full buckets.
Frequently Asked Questions
Where can I get the trash cans or Buckets for crawlspaces?
Amazon is the only prominent that you can purchase everything dealing with crawlspaces. However, you can still visit some nearby hardware dealer shops.
What are some common items for air tightening crack between the dust collector and the bucket?
E6000 is the preferable sealant, but you can opt for other items like epoxy, bubble gums, hot glue, JB weld Calk, etc.; I recommend E6000 because it is more flexible.
Conclusion
Digging out a crawlspace can do yourself with the above guide and useful tools and equipment. You don’t have to waste a lot of money hiring an expert. Let this happen when you don’t have time, but not lack of knowledge. Remember, you can use a basement for many purposes,i.e., for storage purposes, movie theater, or living purposes.
However, not all crawlspace or basement is similar; you might be forced to seek the help of an expert who knows how to do it. We have some professionals working in companies, dealing with supporting foundations, and repairing concrete. Look for them and enjoy sweet dreams.